
How to Download and Install Salesforce CLI: A 2026 Guide
The Salesforce Command Line Interface (CLI) is an essential tool for developers and admins, simplifying tasks like managing orgs, deploying metadata, and automating workflows within Salesforce. Whether you’re building custom apps or syncing data, installing the CLI is your first step to unlocking its power. This guide walks you through downloading and installing the Salesforce CLI on Windows, macOS, or Linux, ensuring you’re ready to supercharge your Salesforce experience.
What Is Salesforce CLI and Why Does It Matter?
What Exactly Is the Salesforce CLI?
Salesforce CLI is an open-source, cross-platform command-line tool developed and maintained by Salesforce. It provides developers, administrators, and DevOps engineers with a unified interface to interact with Salesforce orgs, metadata, and data directly from their terminal or command prompt. Instead of navigating through the browser-based Setup menu for every configuration change, Salesforce CLI allows you to execute powerful commands in seconds, dramatically accelerating development cycles.
The tool is built on Node.js and is available for Windows, macOS, and Linux. It supports a plugin architecture, meaning the community and Salesforce itself can extend its capabilities through installable plugins. As a result, Salesforce CLI is not just a single tool — it is a growing ecosystem of commands and extensions that evolves alongside the Salesforce platform itself.
What Are the Core Capabilities of Salesforce CLI?
Salesforce CLI covers a remarkably wide range of development and administrative tasks. Understanding its capabilities helps clarify why it has become the standard tool for Salesforce development teams worldwide. Its core capabilities include:
CI/CD Integration: Integrate seamlessly with GitHub Actions, Jenkins, GitLab CI, and other pipelines for automated deployments.
Org Management: Create, authenticate, and switch between scratch orgs, sandboxes, and production environments with simple commands.
Metadata Deployment: Push and pull metadata changes between your local project and a Salesforce org, enabling source-driven development.
Data Operations: Import and export data using SOQL queries and data plan files, making it easy to seed scratch orgs with test data.
Apex Execution: Run anonymous Apex scripts directly from the command line without opening the Developer Console.
Testing: Execute Apex unit tests and retrieve test results in real time.
Package Development: Create, version, and install second-generation packages (2GP) for ISV and enterprise distribution.
What Are the System Requirements for Installing Salesforce CLI?
What Operating Systems and Versions Are Supported?
Before downloading Salesforce CLI, it is important to confirm that your system meets the minimum requirements. Salesforce actively supports the following operating systems and versions:
| Operating System | Supported Versions | Notes |
| Windows | Windows 10, Windows 11 | 64-bit recommended; .exe installer available |
| macOS | macOS 11 (Big Sur) and later | Homebrew or .pkg installer recommended |
| Linux (Debian/Ubuntu) | Ubuntu 20.04, 22.04 LTS | .deb package or npm installation |
| Linux (RHEL/CentOS) | RHEL 8, CentOS 8 and later | .rpm package available |
| Node.js (npm method) | Node.js 18.x LTS or later | Required only for npm-based install |
Additionally, Salesforce recommends having at least 4GB of RAM and a modern processor for a smooth experience, especially when working with large metadata deployments or running multiple simultaneous org connections. A stable internet connection is also essential, since most Salesforce CLI commands communicate with Salesforce’s cloud servers.
Is Node.js Required to Install Salesforce CLI?
Node.js is only required if you choose to install Salesforce CLI via npm (Node Package Manager). However, the recommended installation method — using the official Salesforce installer — bundles its own Node.js runtime internally and does not require a pre-installed version of Node.js on your machine. This is an important distinction, because it means most users can simply download the installer and run it without worrying about Node.js version compatibility. That said, if you are a developer who already uses Node.js for other projects and prefers the npm installation path, Salesforce CLI works well with Node.js 18.x LTS or later. Overall, Salesforce has made significant efforts to simplify the installation experience and remove barriers to entry.
Step-by-Step Installation Guide
Step 1: Download Salesforce CLI
- Visit the Official Site: Go to the Salesforce CLI download page.
- Choose Your OS: Select the installer for your operating system:
- Windows: .exe file (e.g., salesforce-windows-x64.exe).
- macOS: .pkg file (e.g., salesforce-macos.pkg).
- Linux: .tar.gz or .tar.xz file (e.g., salesforce-linux-x64.tar.xz).
- Start the Download: Click the link, and the file will save to your default downloads folder.
Step 2: Install Salesforce CLI
The installation process varies by OS—follow the steps for your system:
Windows
- Run the Installer: Double-click the downloaded .exe file in File Explorer.
- Follow Prompts: Accept the license agreement, choose an install location (default is fine), and click “Install.”
- Finish Up: Once complete, click “Finish.” The CLI’s sf and sfdx commands are added to your PATH automatically.
- Restart Terminal: Close and reopen Command Prompt or PowerShell to refresh the environment variables.
macOS
- Open the Package: Double-click the downloaded .pkg file in Finder.
- Install It: Follow the on-screen prompts, agreeing to the terms and clicking “Install.” You may need to enter your admin password.
- Complete Installation: Click “Close” when done. The CLI binaries are installed to /usr/local/bin.
- Restart Terminal: Quit and relaunch Terminal to load the CLI commands.
Linux
- Extract the Archive: Open a terminal, navigate to your downloads folder (cd ~/Downloads), and run: </>Bash
tar -xvf salesforce-linux-x64.tar.xz - Move Files: Copy the extracted files to a system directory, like /usr/local/bin: </>Bash
sudo mv sfdx /usr/local/bin/ &&sudo mvsf /usr/local/bin/ - Verify Permissions: Ensure the binaries are executable: </>Bash
sudo chmod +x /usr/local/bin/sfdx /usr/local/bin/sf - Refresh Shell: Run source ~/.bashrc (or equivalent for your shell) to update your session.
Step 3: Verify the Installation
- Open a Terminal: Use Command Prompt (Windows), Terminal (macOS), or your Linux shell.
- Check Version: Run these commands: </>Bash
sf --version sfdx --versionYou should see output like sf/2.82.6 or sfdx/7.209.6, confirming the CLI is installed. (Note: sfdx is the legacy command; sf is the modern standard.) - Troubleshoot: If the commands aren’t recognized, ensure the install path is in your system’s PATH variable.
Step 4: Update the CLI (Optional)
To ensure you’re on the latest version:
- Run: </>Bash
sf update - Wait for the update to complete. This keeps your CLI aligned with Salesforce’s latest features and fixes.
Post-Installation: First Steps
- Authorize an Org: Connect to a Salesforce org with: </>Bash
sf org login web --alias MyOrgThis opens a browser for login, saving the org alias for future use. - List Commands: See all available commands with: </>Bash
sf commands - Create a Project: Start a new Salesforce DX project: </>Bash
sf project generate -n MyProject
Tips for Success
- Set Up Java: If using VS Code extensions, install JDK 11 or 17 and set the JAVA_HOME environment variable.
- Use a Version Control System: Pair the CLI with Git for source tracking.
- Check Compatibility: The CLI evolves with Salesforce releases —keep it updated.
- Secure Access: Never share auth tokens or store them in public repositories.
What Should You Do After Installing Salesforce CLI?
How Do You Authenticate Salesforce CLI With Your Salesforce Org?
After successfully installing Salesforce CLI, the next critical step is authenticating it against your Salesforce org. Authentication establishes a secure connection between the CLI and your org, allowing you to run commands that read and modify org data and metadata. Salesforce CLI uses OAuth 2.0 for authentication, which means you log in through your browser rather than entering credentials directly in the terminal.
To authenticate, open your terminal and run the following command:
sf org login web –set-default
This command opens your default browser and directs you to the Salesforce login page. After logging in with your Salesforce credentials, the browser will confirm successful authentication and you can return to the terminal. Furthermore, the –set-default flag sets this org as your default org, meaning subsequent commands will target it automatically unless you specify otherwise.
How Do You Verify That Salesforce CLI Is Working Correctly?
After installation and authentication, it is a good practice to run a few verification commands to confirm everything is configured correctly. These essential verification checks help catch any configuration issues early:
| Command | Purpose | Expected Output |
| sf –version | Check CLI version | Installed version number (e.g., @salesforce/cli/2.x.x) |
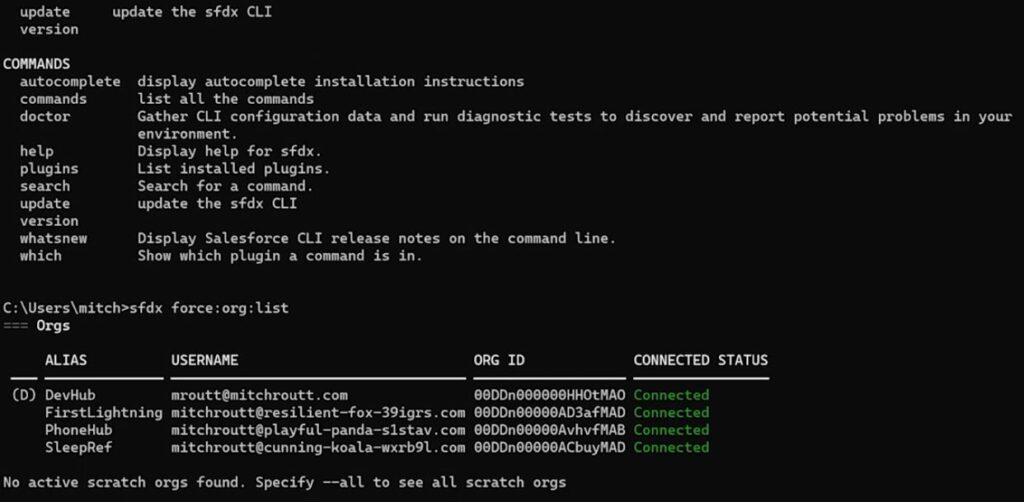
| sf org list | List authenticated orgs | Table showing connected orgs and their aliases |
| sf org display | Show default org details | Org username, ID, API version, and access token status |
| sf plugins list | List installed plugins | Core and community plugins currently installed |
| sf update | Update CLI to latest | Download progress and confirmation of update |
If any of these commands return errors, the most common causes are PATH configuration issues (the CLI executable is not found by the terminal), network firewall restrictions blocking Salesforce’s authentication servers, or permission issues on Linux/macOS. Salesforce’s official documentation at developer.salesforce.com provides troubleshooting guidance for each of these scenarios.
Which Essential Salesforce CLI Plugins Should You Install?
One of the most powerful aspects of Salesforce CLI is its extensible plugin system. While the core CLI installation includes the most commonly used commands, additional plugins unlock specialized functionality. The following table summarizes the most valuable plugins for Salesforce developers:
| Plugin Name | Install Command | Key Features |
| @salesforce/plugin-deploy-retrieve | Included by default | Deploy & retrieve metadata, source tracking |
| @salesforce/plugin-org | Included by default | Org creation, auth, scratch org management |
| @salesforce/plugin-apex | Included by default | Run Apex, execute tests, manage Apex logs |
| @salesforce/plugin-data | Included by default | SOQL queries, data import/export, record management |
| @salesforce/plugin-packaging | sf plugins install @salesforce/plugin-packaging | 2GP package creation, versioning, and promotion |
| sfdx-git-delta | sf plugins install sfdx-git-delta | Generate delta deployments from Git diffs — ideal for CI/CD |
Furthermore, the Salesforce community has developed dozens of open-source plugins that extend the CLI with additional capabilities, from automated code quality checks to advanced data management utilities. You can explore community plugins at npmjs.com by searching for ‘sfdx-‘ or ‘sf-plugin’.
What Are the Most Common Salesforce CLI Installation Issues and How Do You Fix Them?
Why Does the sf Command Not Work After Installation?
The most frequent issue after installing Salesforce CLI is the terminal reporting that the sf command is not found, even though installation appeared to complete successfully. This problem typically occurs because the terminal session was not restarted after installation, meaning the updated PATH environment variable has not yet been loaded. To resolve this, simply close all terminal windows and open a new one before running sf commands.
On Windows, if closing and reopening the terminal does not resolve the issue, you may need to manually verify that the Salesforce CLI installation directory (typically C:\Program Files\sf\bin) is present in your System PATH environment variable. You can check this by opening System Properties, navigating to Advanced, and clicking Environment Variables. On macOS and Linux, a similar check of the ~/.zshrc, ~/.bashrc, or ~/.bash_profile files may be necessary to ensure the PATH entry was added correctly.
How Do You Fix Authentication Errors With Salesforce CLI?
Authentication errors are another common challenge, particularly in corporate environments with strict network security policies. If the sf org login web command opens a browser but authentication fails or the browser shows an error, consider the following solutions:
- Firewall Issues: Ensure your network allows outbound connections to login.salesforce.com and test.salesforce.com on port 443.
- Sandbox Authentication: If connecting to a sandbox org, use the –instance-url flag: sf org login web –instance-url https://test.salesforce.com
- JWT Authentication: For CI/CD environments without browser access, use JWT-based authentication with a connected app and certificate instead.
- Token Expiration: If a previously working org connection stops working, re-authenticate using sf org login web and overwrite the stored credentials.
What Is the Final Takeaway on Downloading and Installing Salesforce CLI?
In conclusion, downloading and installing Salesforce CLI is a fundamental first step for any developer or administrator who works seriously with the Salesforce platform. As we have explored throughout this guide, Salesforce CLI is far more than a simple utility — it is the backbone of modern Salesforce development, enabling source-driven workflows, automated testing, continuous integration, and sophisticated org management that would otherwise be impossible through the browser alone.
Moreover, the installation process itself is straightforward and well-supported across all major operating systems. Whether you are working on Windows, macOS, or Linux, Salesforce has invested significant effort in making the CLI accessible and easy to set up. The availability of multiple installation methods — from graphical installers to Homebrew and npm — ensures that every developer can choose the approach that best fits their existing workflow.
Furthermore, once Salesforce CLI is installed and authenticated, the productivity benefits are immediate and substantial. Tasks that previously required navigating multiple Setup menus can be accomplished in seconds from the terminal. Deployments that once took hours of manual work can be automated and run as part of a CI/CD pipeline. Data migrations that required point-and-click tools can be scripted and repeatable. In every case, Salesforce CLI empowers teams to work faster, more reliably, and with greater confidence.
What Are the Key Salesforce CLI Commands Every Developer Should Know?
| Category | Command | Description |
| Authentication | sf org login web | Authenticate to an org via browser OAuth |
| Authentication | sf org list | List all authenticated orgs |
| Org Management | sf org create scratch | Create a new scratch org |
| Org Management | sf org open | Open an org in the browser |
| Metadata | sf project deploy start | Deploy metadata from local project to org |
| Metadata | sf project retrieve start | Retrieve metadata from org to local project |
| Apex | sf apex run | Execute anonymous Apex from a file |
| Testing | sf apex run test | Run Apex unit tests in an org |
| Data | sf data query | Execute a SOQL query against an org |
| Packages | sf package create | Create a new second-generation package |
| CLI Maintenance | sf update | Update CLI to the latest version |
| CLI Maintenance | sf plugins install [plugin] | Install a new CLI plugin |
Final Thoughts
Downloading and installing Salesforce CLI is a quick process that unlocks a world of efficiency for Salesforce development. Whether you’re on Windows, macOS, or Linux, these steps get you up and running in minutes. As of 2026, the CLI remains a cornerstone of Salesforce DX, empowering you to automate, deploy, and manage with ease. Ready to explore? Log in to your org and start typing commands today!
Frequently Asked Questions
Yes, Salesforce CLI is completely free to download and use. It is an open-source tool maintained by Salesforce and available to anyone with a Salesforce account — or even without one, since the CLI itself does not require a license. However, to connect the CLI to a Salesforce org and perform meaningful operations, you will need access to a Salesforce environment. Salesforce offers free Developer Edition orgs at developer.salesforce.com, which are permanent, full-featured environments perfect for learning and development.
Absolutely. Salesforce CLI is a cross-platform tool designed to work on all three major operating systems: Windows, macOS, and Linux. Salesforce provides dedicated installers and installation methods for each platform, ensuring that developers can use the same CLI commands and workflows regardless of their operating system. On Windows, installation is typically done via a downloadable .exe installer or through the Winget package manager. On macOS, the recommended method is via Homebrew or a downloadable .pkg installer. Also on Linux, Salesforce provides .deb and .rpm packages, as well as npm-based installation.
This is one of the most common questions from developers new to Salesforce CLI. Historically, the Salesforce CLI used the sfdx command prefix, which stood for Salesforce DX. In 2022, Salesforce released a major update that introduced a new unified CLI experience under the sf command prefix. The new sf CLI consolidates multiple Salesforce tools into a single, more intuitive interface with improved command naming and discoverability. While sfdx commands are still supported for backward compatibility, Salesforce strongly recommends transitioning to the sf command syntax for all new projects.
Recommended:
- How Should You Structure Your CRM Team for Maximum Success?
- Using Salesforce to Build a 360° Customer View
- What Should Investors Know About Salesforce Stock?
- What KPIs Should Every Business Track in Their CRM System?
- What is CRM Database?
- How Can CRM Analytics Transform Your Salesforce Experience?
- CRM Management
- Getting Started With Pipedrive
- What is Pipedrive CRM?
- Choosing the best low-cost CRM
- Top Microsoft Dynamics Alternatives and Competitors
- CRM Cost Comparison of Top Platforms
